Maximizing Reality: Getting Started
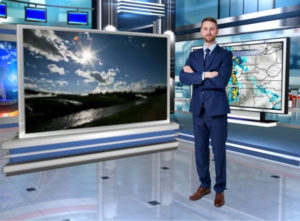
Max Reality is a powerful, dynamic weather storytelling tool. There are many benefits to using the proprietary software developed by The Weather Company, an IBM Business. On the most basic level, it adds variety to the on-air presentation. It can also simplify complicated weather explanations and focus viewers’ attention on essential information. Plus, it also conveys innovation. Maximizing the benefits of augmented reality can help broadcast meteorologists establish themselves as the go-to weather expert in their community.
The user interface is familiar to anyone who’s worked with the Max platform. The same settings that create Studio and Earth scenes are used to develop Max Reality content. The Properties tab is where you’ll find the settings that transform your scenes. For those who don’t usually make graphics from scratch, some of these menus might seem unfamiliar. These settings can have a dramatic effect on augmented reality content. What is technically an overlay can be made to look like a real piece of the news set with sheen, shadows, and depth.
I was one of the first broadcast meteorologists to incorporate Max Reality into my daily weathercasts back in 2015 when I was the Chief Meteorologist at KTRK-TV in Houston. As a member of The Weather Company’s field trial team, I am intimately familiar with the software. I know how to push the system to create engaging augmented reality weather content.
READ MORE: MAX REALITY ADVANCED TRAINING NOW AVAILABLE
Over time, I developed some best practices that I’ll be sharing here on my website. This first article is for those just getting started with Max Reality. Before creating new content, I believe there are three things you should do first that will save time later and make all your scenes look, well…real!
Set Camera Views
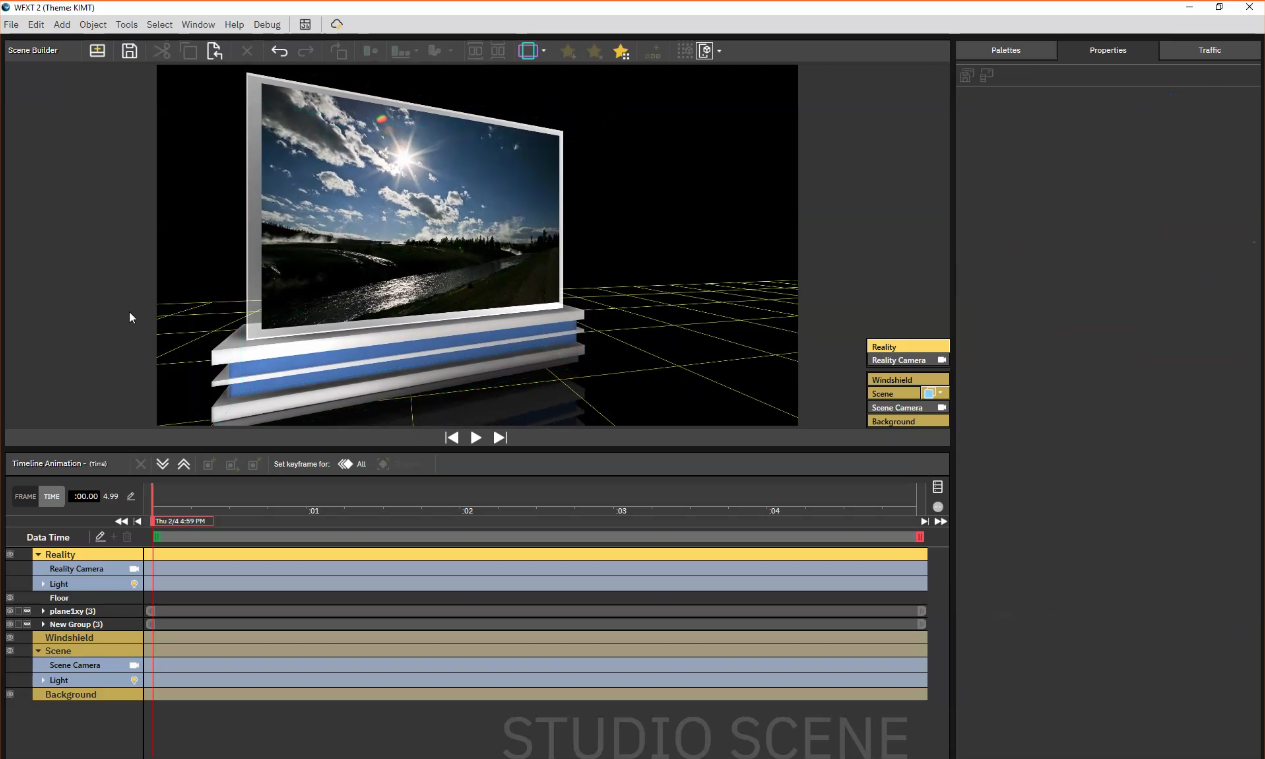
When you first open Scene Builder, the Reality layer’s default camera view is too far away to be useful. I prefer to create new content using a straight-on camera view that provides just enough space to add 3D shapes and various elements to the scene. You might discover later that it makes more sense to create new content using a camera view that matches the studio camera shot.
For a straight-on camera view, reposition the yellow marker in the center with about three grid squares between it and the bottom of the preview window. Since each grid line is one meter apart, three squares represent about ten feet of floor space. Save that camera view, calling it “Work Space” or something appropriate.
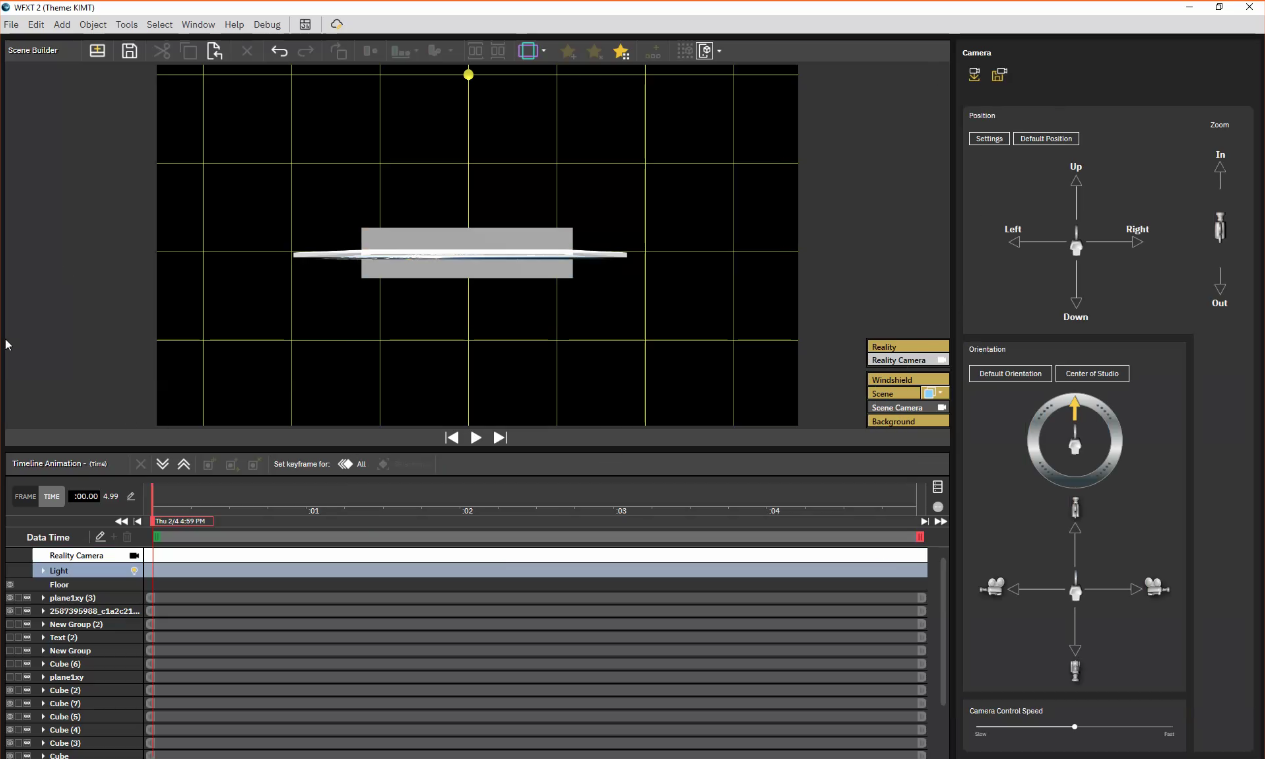
When adding 3D shapes to your scene, it’s easy to fool your eyes. Objects that look stacked in the preview window might be out of alignment when angled or when the camera view changes. To ensure everything in your scene is aligned correctly, position the Reality camera directly above and aimed straight down on the gridded workspace. Save this “Top Down” view and check it often while creating your scene.
Finally, change the camera view to match the shot used by the studio camera. Even if you have camera-tracking capabilities, reproducing the most used studio camera shots in Max will allow you to see what your augmented reality content looks like on-air without having to fire up the studio cameras.
I recommend saving the camera views in Max using the same name used by the production crew for the studio camera shots. This makes it easier to communicate which camera position you need and ensures the Max Reality camera view always matches the studio camera shot.
Adjust the lighting
The light source in Max Reality can affect the intensity and hue of different colors. Objects that are bright red can appear burgundy or pink depending on the position of the lighting. Blue can vary between cyan and navy. To establish a consistent look among all your Max Reality scenes, position the light source in the same position in every scene.
The Reality layer’s default lighting position is front-upper-left, which distorts colors and creates very dark shadows. I prefer to reposition the light control, so it appears to come directly from the front. To do this, click on the Light option within the Reality layers on the lower left side of the user interface. Under the Properties tab, reposition the light control to the middle front with these specific values: X 0.000, Y 0.000, and Z -10.000.

Moving the light control front and center produces more contrast and creates natural shadows. Start with the light control in this position. After completing the scene and moving your 3D elements into the final on-air position, use the dials to make small adjustments to match your studio lighting and emphasize (or deemphasize) shadows and add depth to your scene.
While you can set keyframes for the light control, the settings cannot be saved and recalled in Max. To make sure the light control settings are the same every time, write them down on a sticky note and attach it to your monitor. Or, as suggested below, save the entire scene before doing anything else.
By the way, within this menu there is a magic button that will have a dramatic effect on your Max Reality scenes. Ambient Occlusion applies “advanced shadowing of objects.” This feature changes the entire look of the scene by increasing shadow contrast and smoothing.
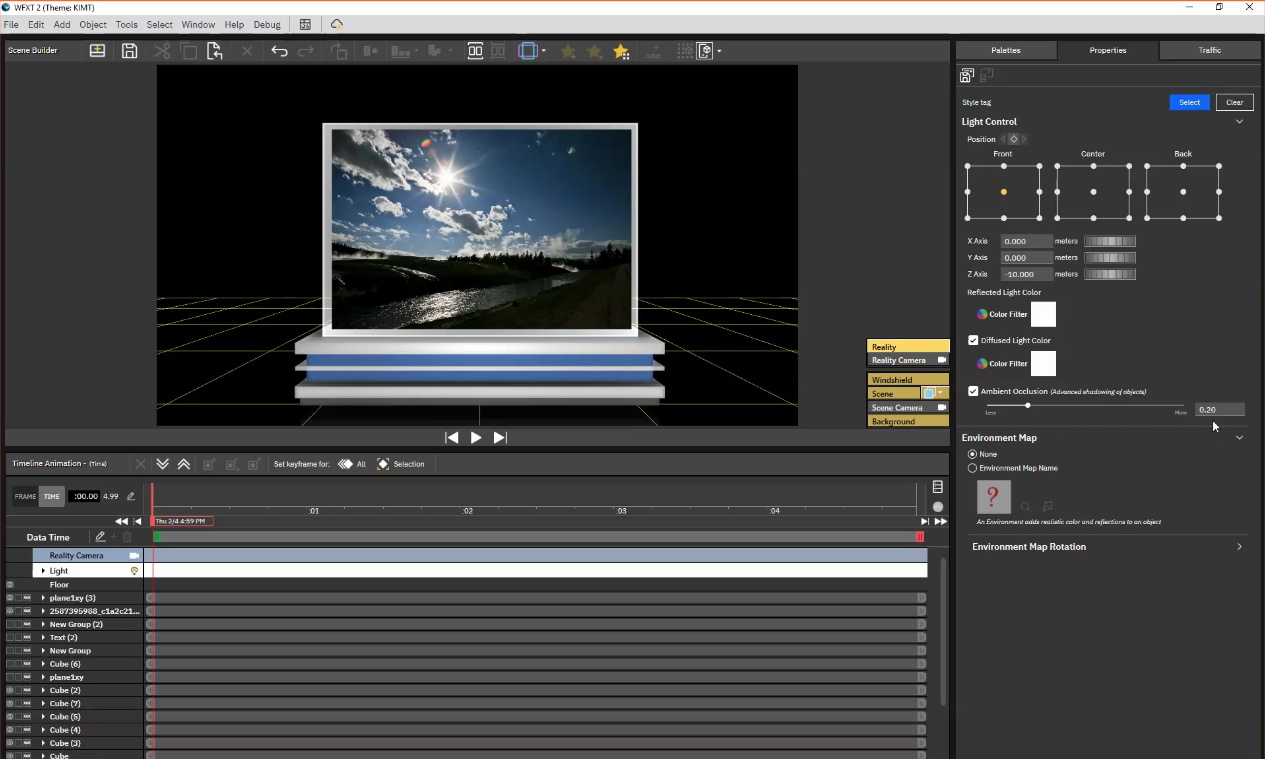
Since it affects every object, I recommend building the scene with Ambient Occlusion turned off. It should be the very last thing you apply and adjust. But be aware this setting can cause performance issues while playing back very complex scenes, especially with older computer hardware. A setting of .20 or less is recommended.
Develop a long descriptive naming system
The thumbnails on Max display a screengrab of the content in the Scene and Windshield layers, not the content in the Reality layer. To check the Reality content, you either need to preview the scene or open it in Scene Builder. To give you an idea of what the scene contains without doing that, I suggest saving each Max Reality scene using a long descriptive name.
Start with the prefix “AR” to designate an augmented reality scene. Next, indicate the camera view or studio space where the scene will play out. Then, list the weather data or content in the Reality layer and add a description of the weather data or content in the Scene layer.
Here’s an example of a long descriptive name: AR Monitor Headlines with Radar
In this example, the long descriptive name indicates the scene contains augmented reality content to be used at the monitor wall with Weather Headlines in the Reality layer and radar in the Scene layer. Using this naming convention groups all the Max Reality scenes together toward the top of the library, sorted by camera view and content.
Save these settings
After establishing the camera views and adjusting the light control, save this scene calling it something like, “AR START HERE.” Creating a master scene reduces the amount of time it takes to build something from scratch and guarantees all your scenes use the appropriate camera and lighting settings.
When you’re ready to create original Max Reality content, load the master scene. Start with the “Work Space” camera view. Add your 3D elements and check the alignment periodically with the “Top Down” camera view. Load the saved camera view in Max that matches the real studio camera shot and move everything into position for final editing. Then turn on Ambient Occlusion and watch your scene come alive!
Tim Heller is an AMS Certified Broadcast Meteorologist, Talent Coach, and Weather Content Consultant. He helps local TV stations and broadcast meteorologists communicate more effectively on-air, online, and on social media.